Web : Notifications
- Updated on July 27th, 2024
- 4 Minute to read
- Share
-
Dark
1. Quick Overview
Purpose: The Notifications page in OPUS allows users to manage and view notifications sent to operators. This guide explains the various features and elements on the Notifications page, helping users efficiently create, filter, and report notifications.
Pre-Requisites
Needed Access / Permissions: Access to the OPUS platform.
Pre-setup Requirements: Ensure you are logged into the OPUS account
2. Step-by-Step Instructions

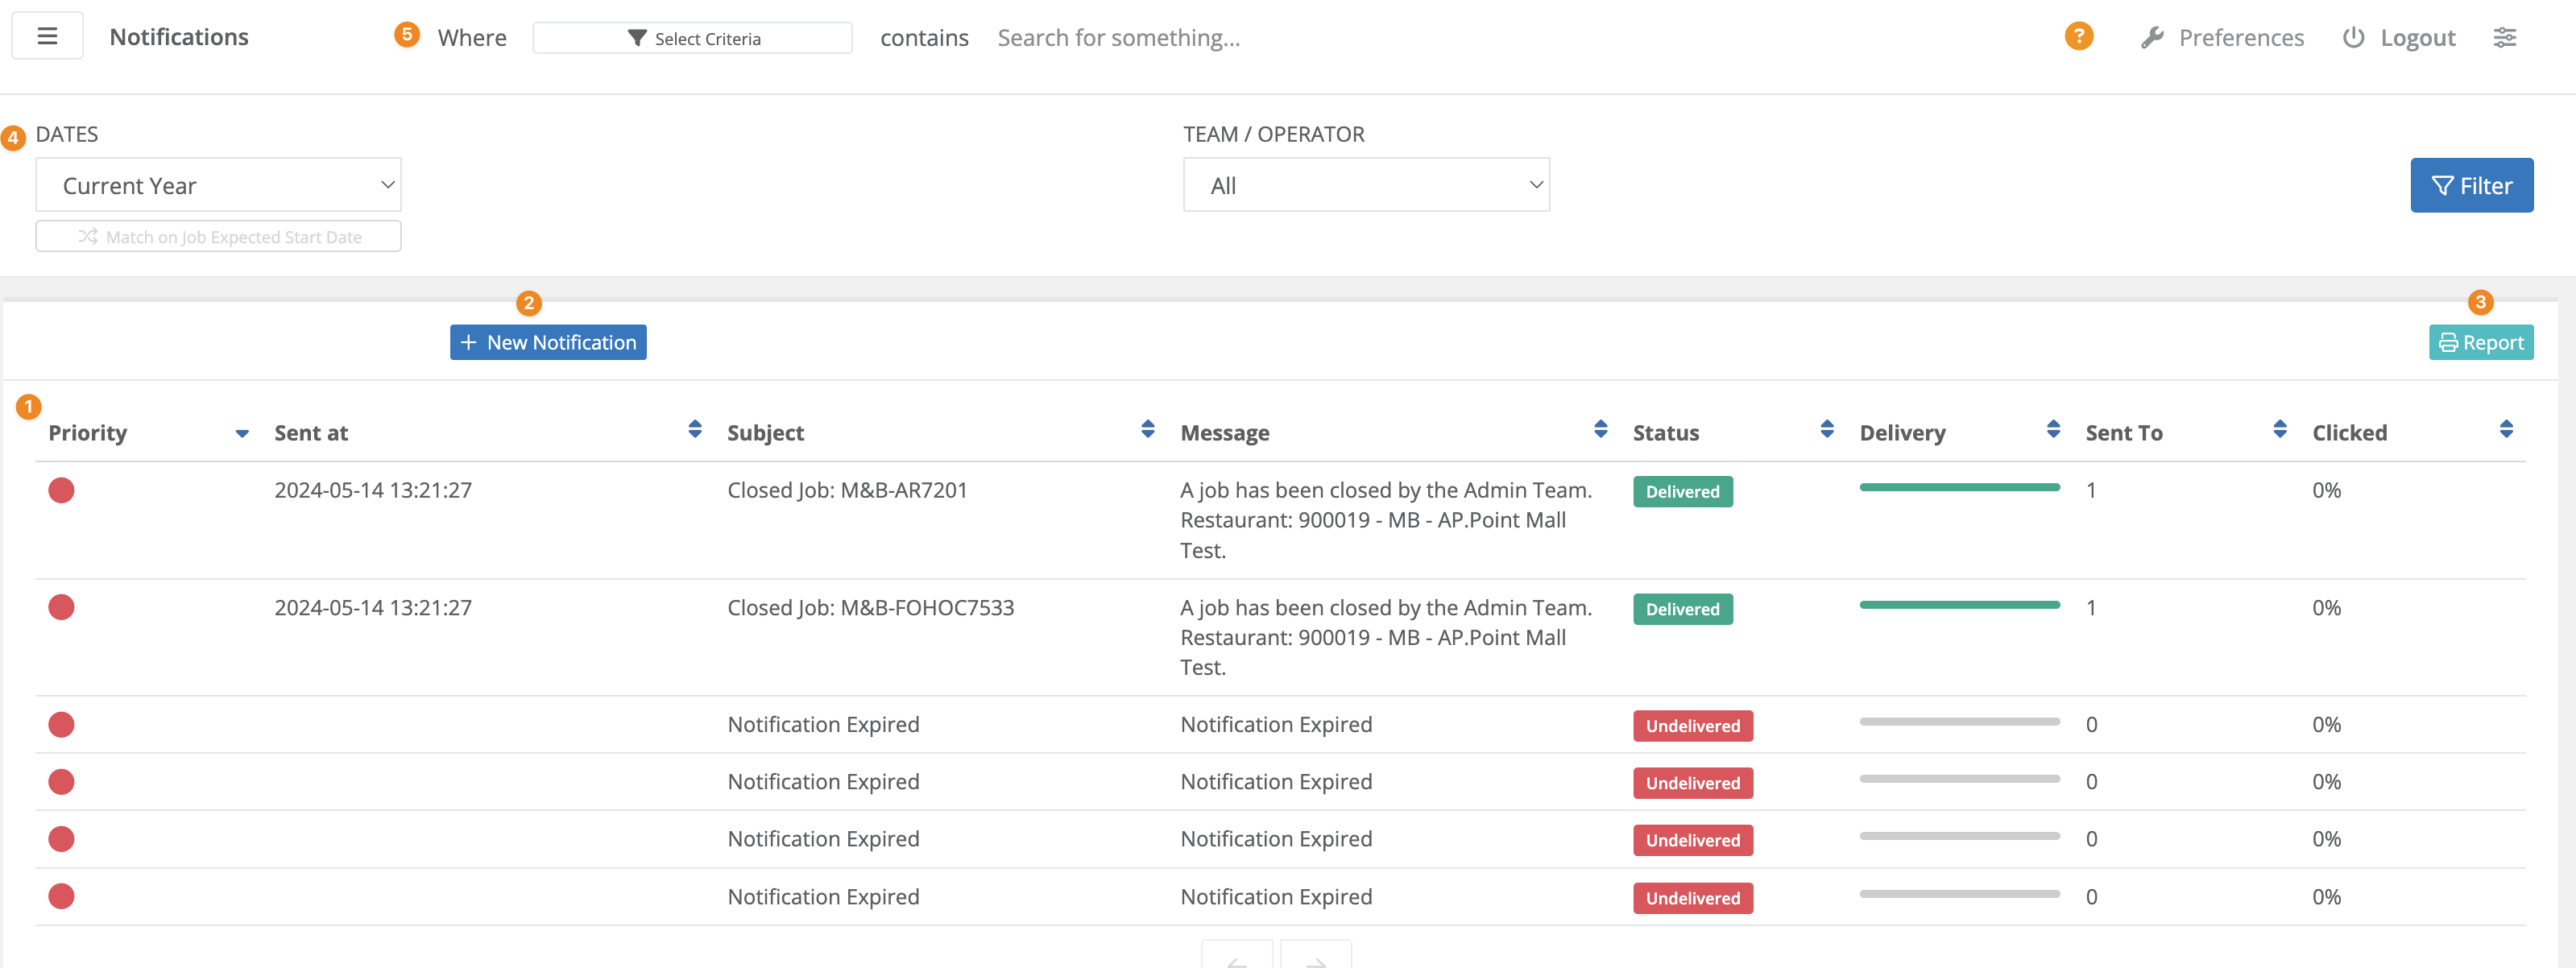
1. Grid
The grid displays a list of all notifications with columns for Priority, Sent at, Subject, Message, Status, Delivery, Sent To, and Clicked. Each entry provides detailed information about the notifications sent.
Usage: Use the grid to view and manage notifications. Click on column headers to sort the data.
Columns:
- Priority: The importance level of the notification.
- Sent at: Timestamp when the notification was sent.
- Subject: The subject line of the notification.
- Message: The content of the notification.
- Status: The current status of the notification (e.g., sent, pending).
- Delivery: Delivery status of the notification.
- Sent To: The recipient(s) of the notification.
- Clicked: Indicates whether the notification has been opened by the recipient.
2. New Notification

The ‘New Notification’ button allows users to create a new notification. Clicking this button opens a form where users can enter details for the notification, such as the subject, message, priority, and recipients.
Usage: Click this button to create and send a new notification to operators.
3. Report

The Report button allows users to generate and export reports based on the notification data. Reports can be customized and exported in various formats such as XLS, CSV, PDF, and more.
Usage: Click this button to generate and view reports on notifications.
4. Filter bar

The filter bar provides options to apply various filters to narrow down the notification list based on specific criteria such as dates and team/operator.
Usage: Apply the relevant filters to refine the notification list and focus on specific data points.
5. Search bar

The search bar allows users to search for specific notifications using keywords or specific search terms.
Usage: Enter a keyword or search term to quickly locate specific notifications in the list. This helps in efficiently finding relevant information without scrolling through the entire list.
3. Tips and Tricks
Best Practices: Regularly use the filter and search functions to quickly find and monitor notifications. Generate periodic reports to keep track of notification performance and engagement.
Common Issues and Fixes:
If the notification list does not update or display correctly, ensure your internet connection is stable. Refresh the page if necessary. Contact OPUS support if problems persist.
Additional Resources
-
Refer to the OPUS support documentation for more detailed instructions and additional features related to notification management.